- workflow
- /
Data processing nodes
- /
- Custom Code
¶ Custom Code
Custom code nodes allow you to write very flexible custom logic, including but not limited to:
-Perform complex data transformations; -Send network requests; -Throw custom exceptions, manually terminate the process, and so on.
Authoring custom code runs in the isolated sandbox environment of Node.js 14, supporting async/await and the latest [ES6]( https://es6.ruanyifeng.com/ )Grammar. We provide developers with many out of the box libraries and tool classes:
- Network request:axios (opens new window)
- Data operation:lodash (opens new window)、ramda (opens new window)
- Database operations:pg (opens new window)、mysql2 (opens new window)、mysql2/promise (opens new window)、mongodb (opens new window)
- Data encryption:bcrypt (opens new window)、crypto (opens new window)
- Date tool:moment (opens new window)、dayjs (opens new window)
- other:faker (opens new window)、validator (opens new window)、qs (opens new window)、jsonwebtoken (opens new window)、uuid (opens new window)、js-yaml (opens new window)
- Authing built-in tool class: utils (details can be found in the following text)
¶ Create custom code nodes
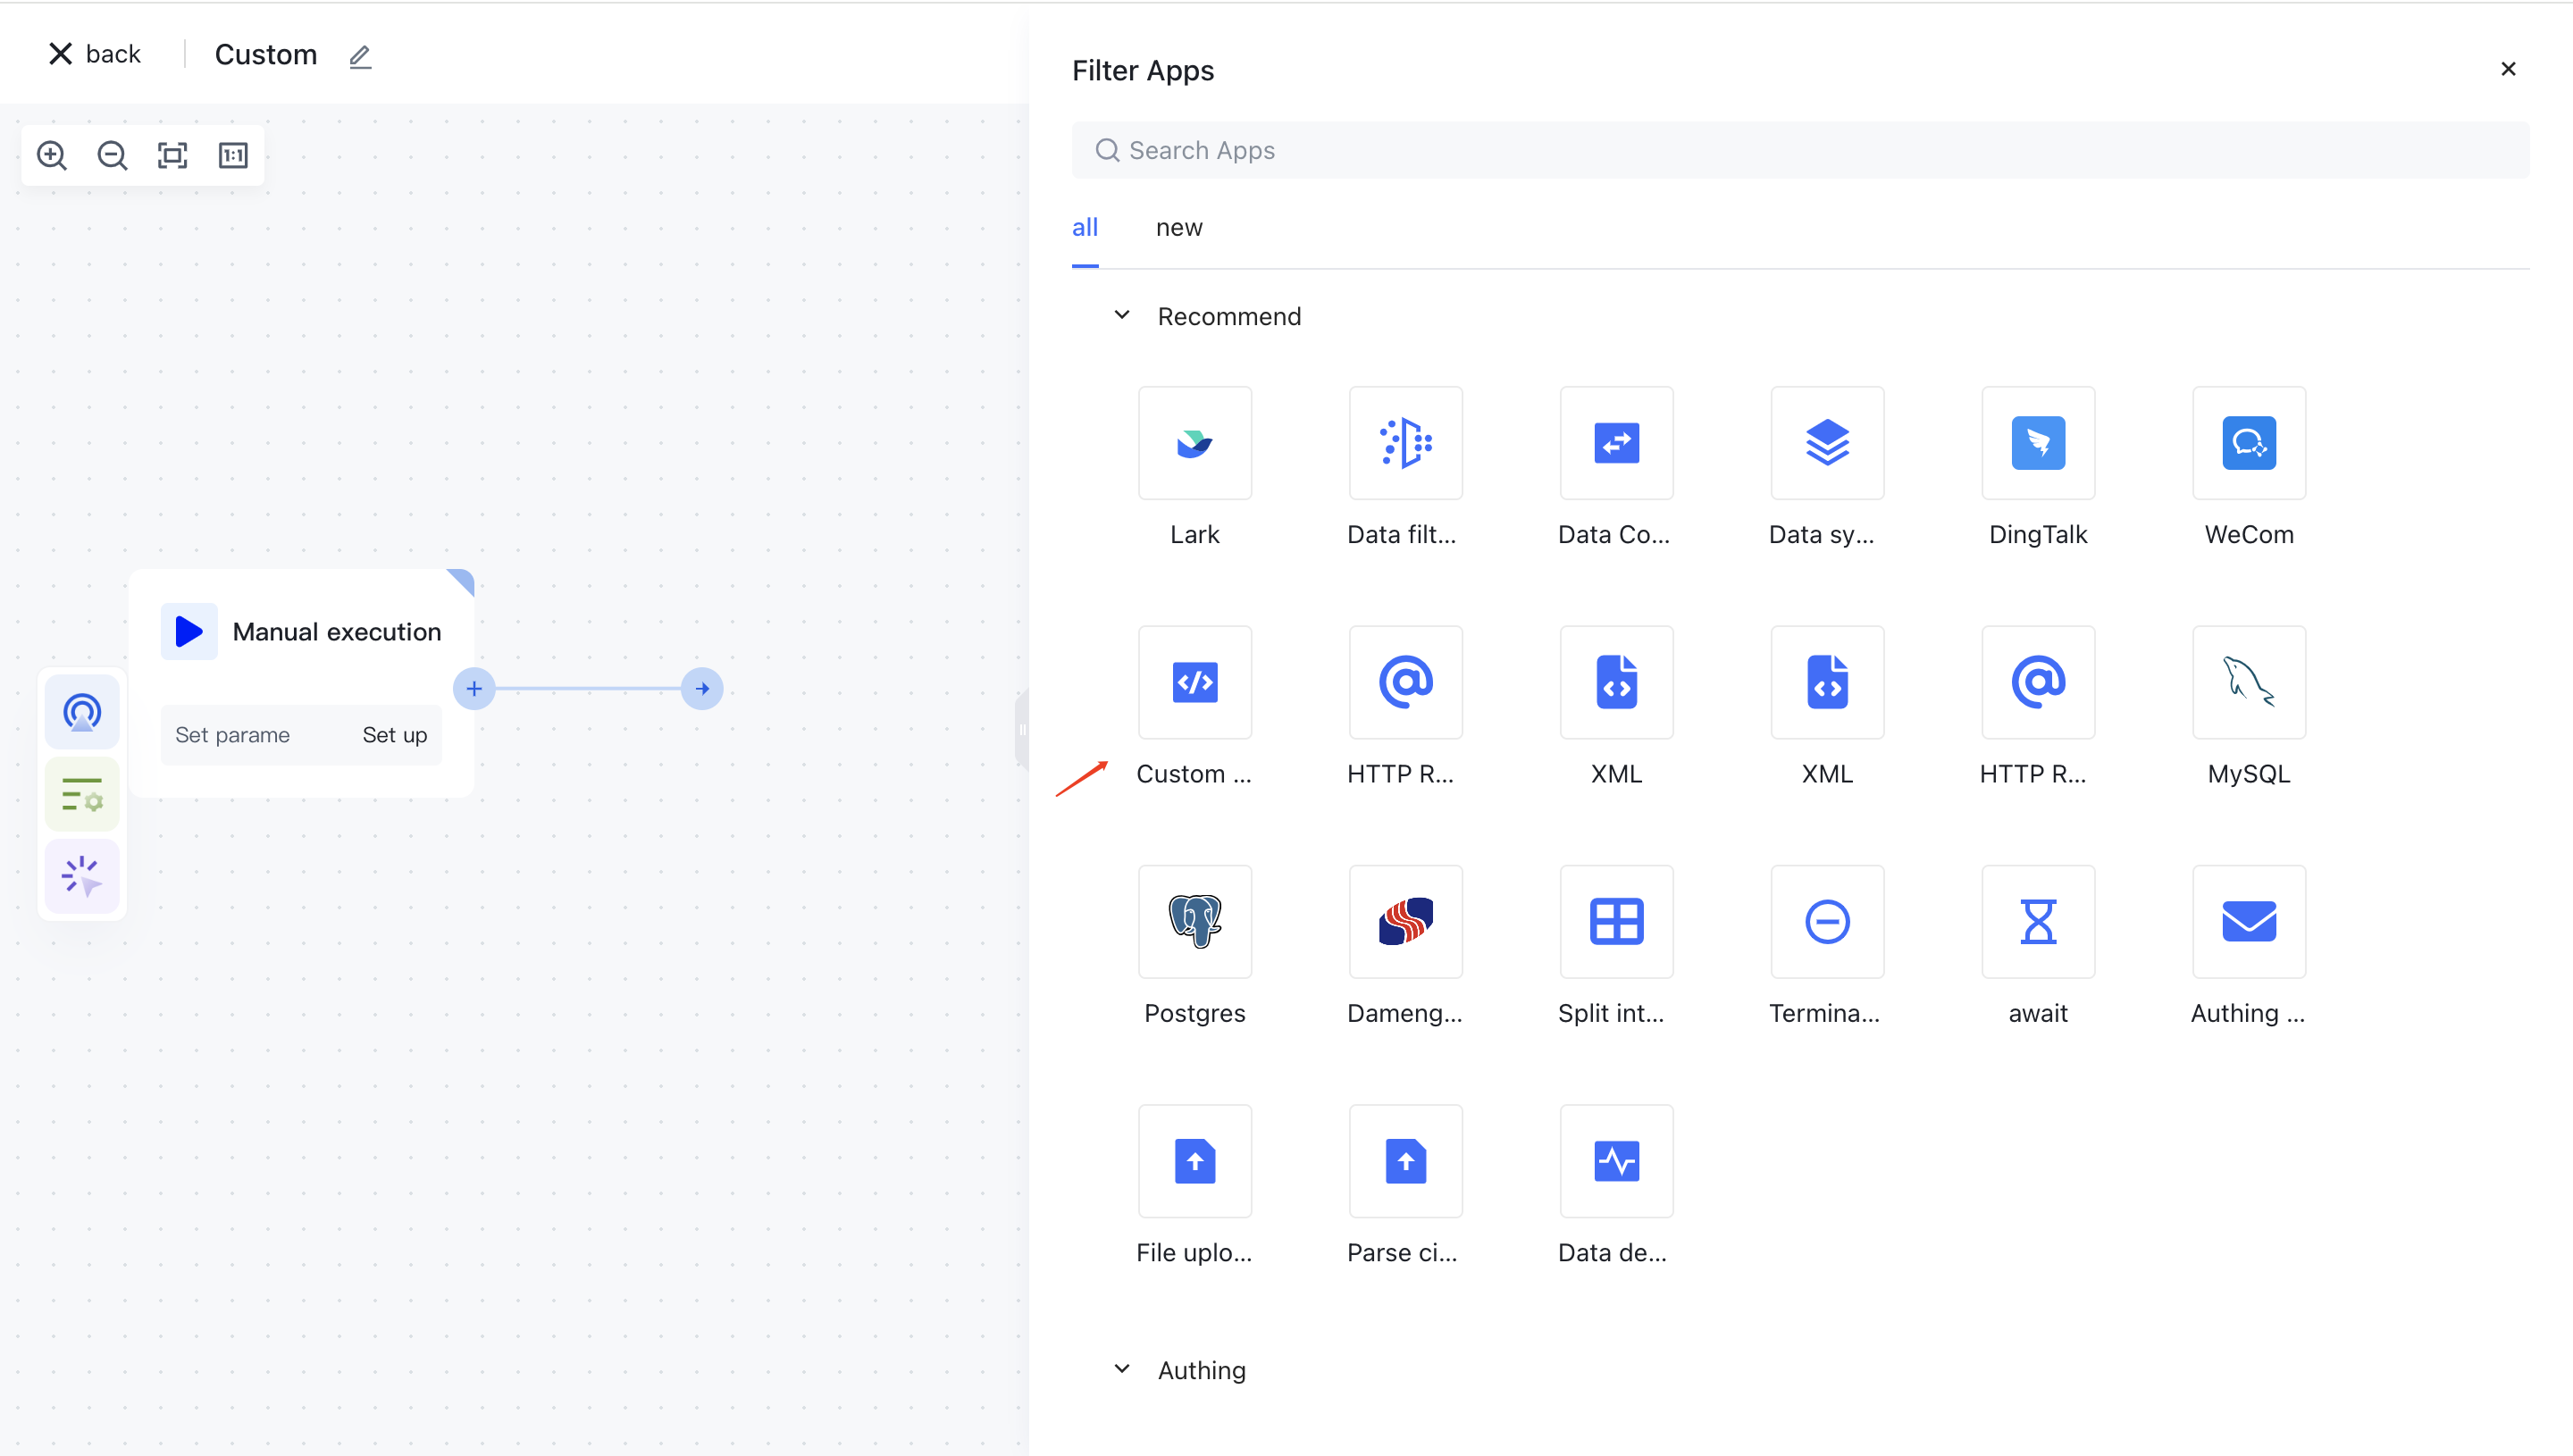
You can add custom code nodes to the Authing identity automation application list:

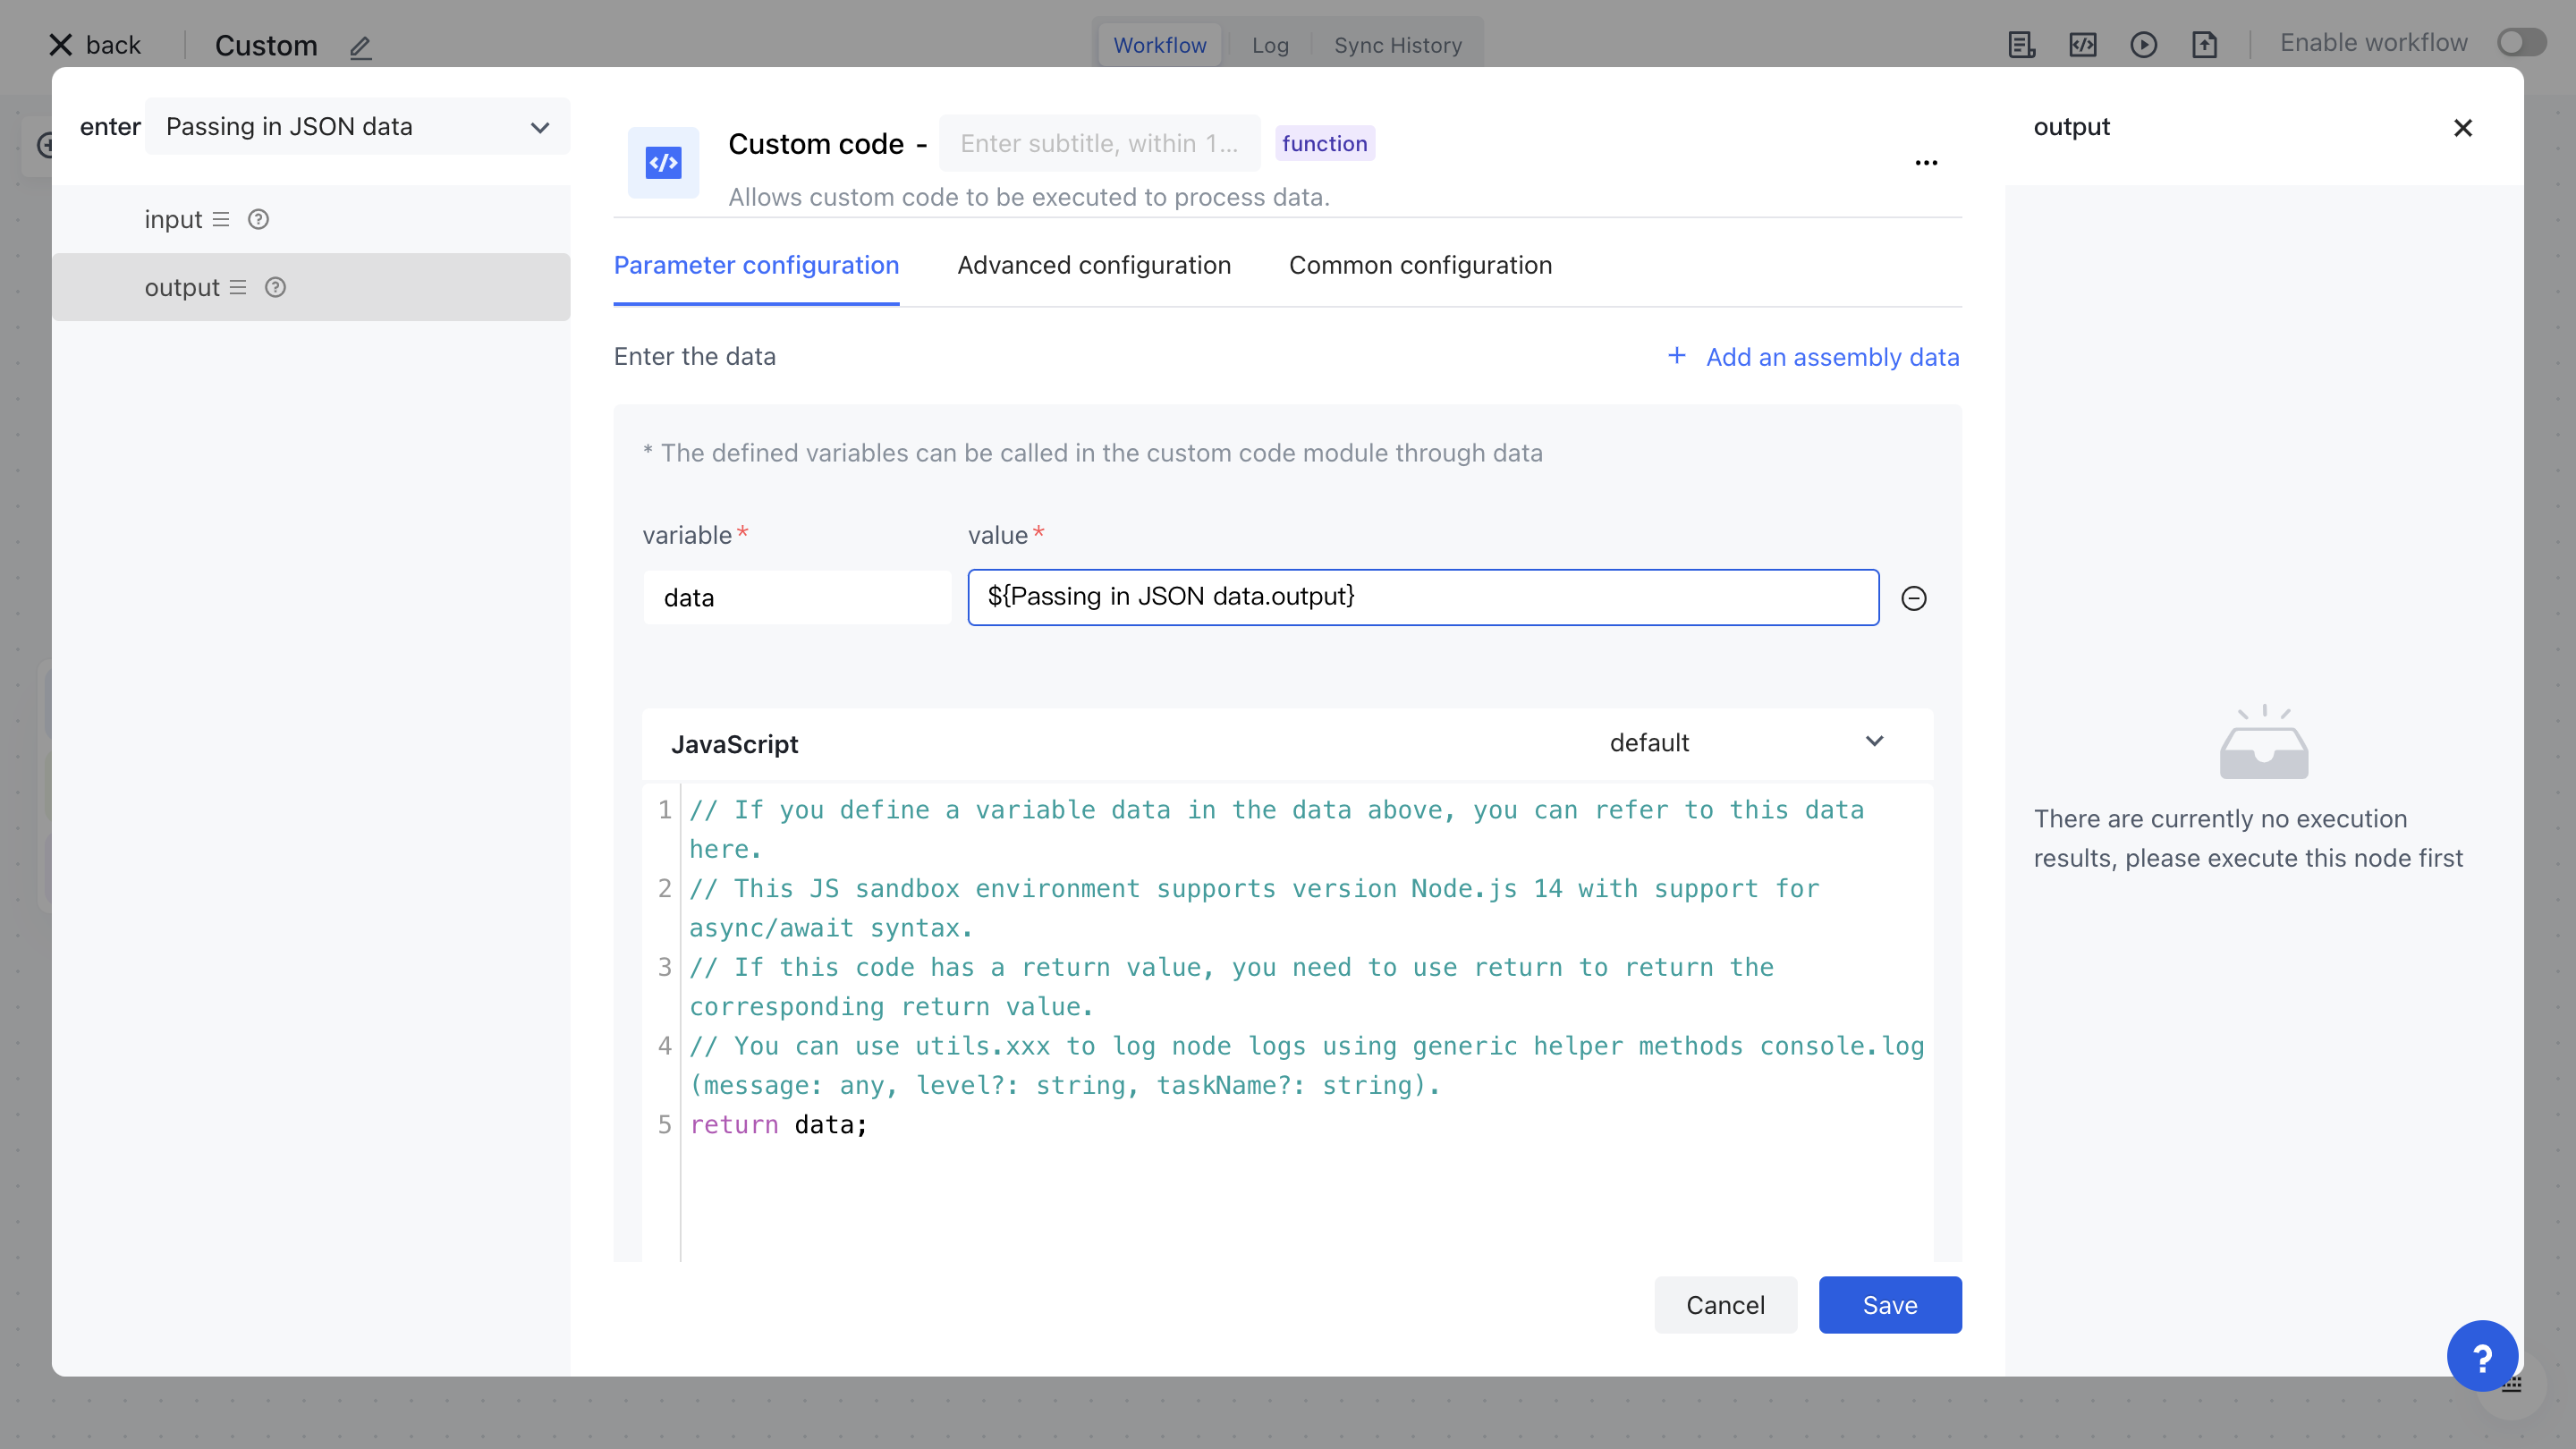
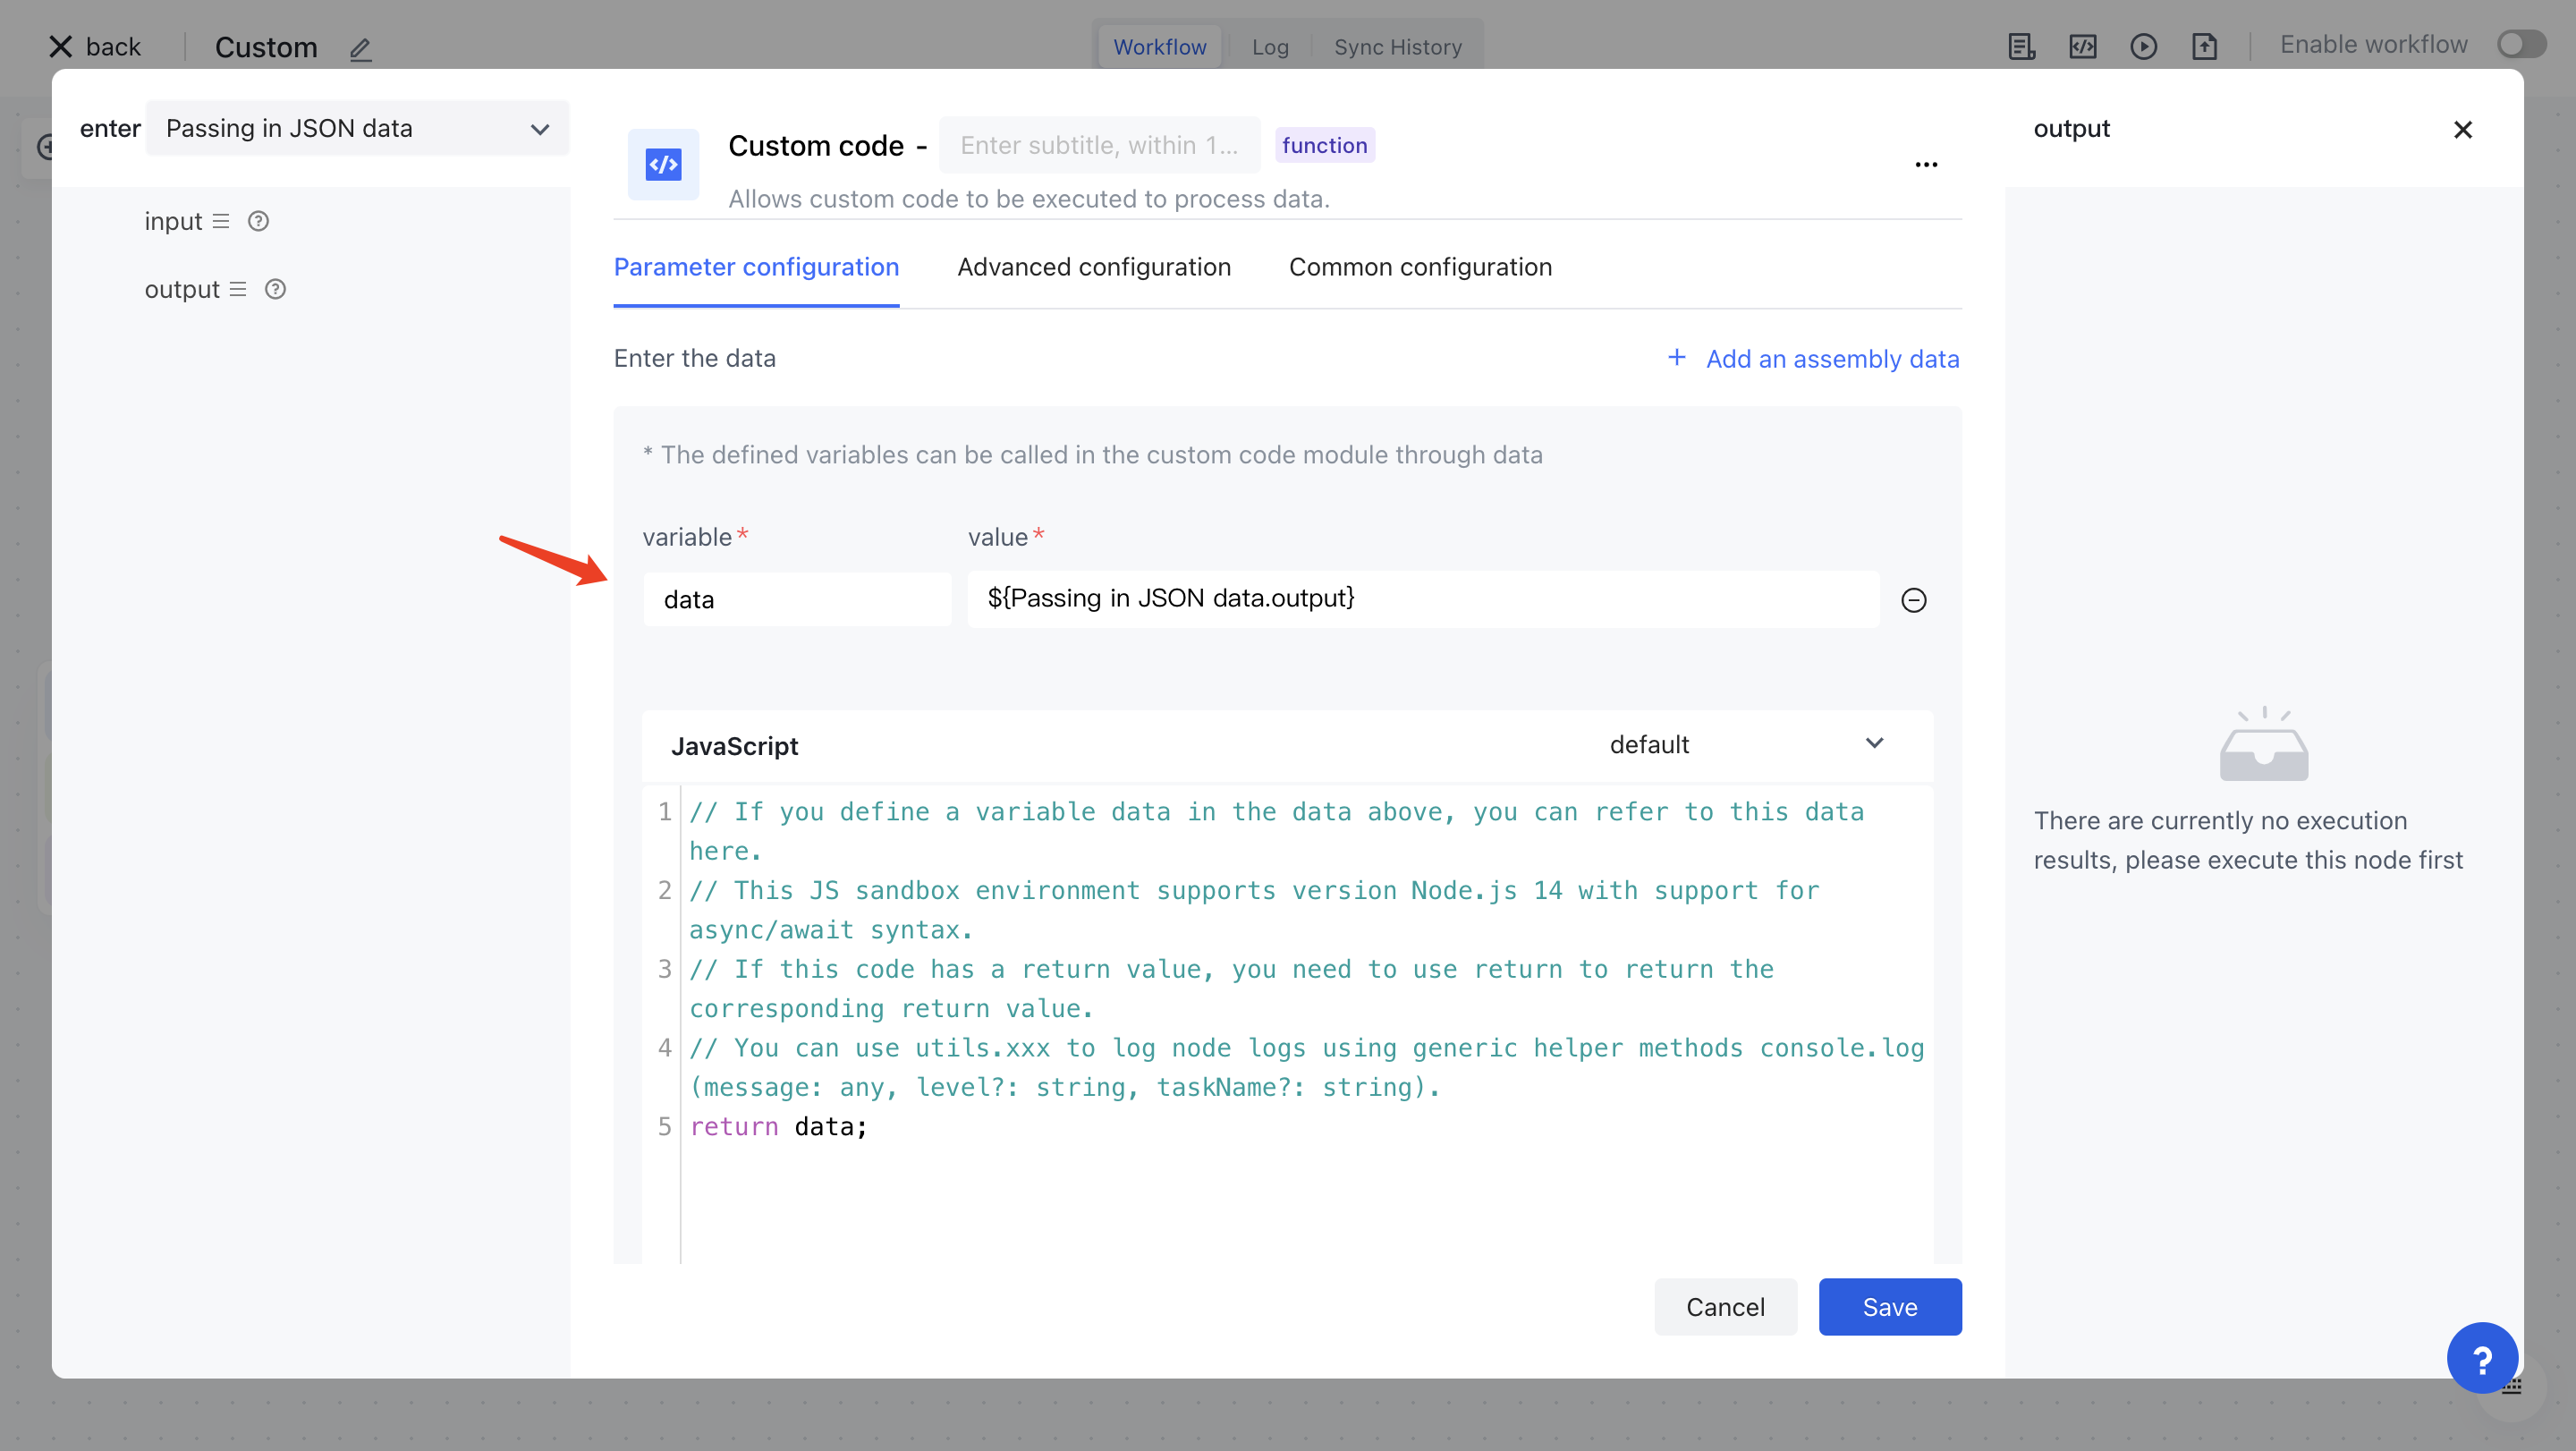
The configuration of custom code nodes is divided into two parts: input data and function body. For example, if you define a variable data in the input data, you can reference this data in the code through data. If this custom code has a return value, a return statement is required to return the result.

¶ Authoring built-in tool class
¶ async utils.generateSerialNumber
Function description: Generate a self increasing sequence of user pool isolation levels.
Function definition: async utils. generateSerialNumber (length, start)
Parameter description:
- Length: The length of the self increasing sequence, for example, if set to 6 bits, if not called once, data such as 00000 1 and 00000 2 will be generated.
- Start: The starting value of the self increasing sequence, which defaults to 0, meaning that the first generated sequence value is 00000 1.
Usage scenario:
- Generate a self increasing job number for the user.
Code example: As shown in the following example code, a self increasing sequence with the formats E00001 and E000002 will be generated.
return "E" + await utils.generateSerialNumber(6, 0);
¶ async utils.rsaEncrypt
Function description: Use RSA public key to encrypt content
Function definition: async utils.rsaEncrypt(plainText, publicKey)
Parameter description:
- PlainText: plaintext that needs to be encrypted
- PublicKey: RSA public key, such as
-----BEGIN PUBLIC KEY-----
xxxxxxxxxxxxxxxxxxxxxxxx
xxxxxxxxxxxxxxxxxxxxxxxx
xxxxxxxxxxxxxxxxxxxxxxxx
-----END PUBLIC KEY-----
¶ async utils.rsaDecrypt
Function description: Use RSA private key to decrypt content
Function definition: async utils rsaDecrypt (encrypted, privateKey)
Parameter description:
- Encrypted: The ciphertext that needs to be decrypted
- PrivateKey: RSA key, such as
-----BEGIN RSA PRIVATE KEY-----
xxxxxxxxxxxxxxxxxxxxxxxx
xxxxxxxxxxxxxxxxxxxxxxxx
xxxxxxxxxxxxxxxxxxxxxxxx
-----END RSA PRIVATE KEY-----
¶ Common scenario examples
Before writing custom code nodes, we use the incoming JSON data point node Mock to create a copy of the data:
[
  {
    "login": "mojombo",
    "id": 1,
    "node_id": "MDQ6VXNlcjE=",
    "avatar_url": "https://avatars.githubusercontent.com/u/1?v=4",
    "gravatar_id": "",
    "url": "https://api.github.com/users/mojombo",
    "html_url": "https://github.com/mojombo",
    "followers_url": "https://api.github.com/users/mojombo/followers",
    "following_url": "https://api.github.com/users/mojombo/following{/other_user}",
    "gists_url": "https://api.github.com/users/mojombo/gists{/gist_id}",
    "starred_url": "https://api.github.com/users/mojombo/starred{/owner}{/repo}",
    "subscriptions_url": "https://api.github.com/users/mojombo/subscriptions",
    "organizations_url": "https://api.github.com/users/mojombo/orgs",
    "repos_url": "https://api.github.com/users/mojombo/repos",
    "events_url": "https://api.github.com/users/mojombo/events{/privacy}",
    "received_events_url": "https://api.github.com/users/mojombo/received_events",
    "type": "User",
    "site_admin": false
  },
  {
    "login": "defunkt",
    "id": 2,
    "node_id": "MDQ6VXNlcjI=",
    "avatar_url": "https://avatars.githubusercontent.com/u/2?v=4",
    "gravatar_id": "",
    "url": "https://api.github.com/users/defunkt",
    "html_url": "https://github.com/defunkt",
    "followers_url": "https://api.github.com/users/defunkt/followers",
    "following_url": "https://api.github.com/users/defunkt/following{/other_user}",
    "gists_url": "https://api.github.com/users/defunkt/gists{/gist_id}",
    "starred_url": "https://api.github.com/users/defunkt/starred{/owner}{/repo}",
    "subscriptions_url": "https://api.github.com/users/defunkt/subscriptions",
    "organizations_url": "https://api.github.com/users/defunkt/orgs",
    "repos_url": "https://api.github.com/users/defunkt/repos",
    "events_url": "https://api.github.com/users/defunkt/events{/privacy}",
    "received_events_url": "https://api.github.com/users/defunkt/received_events",
    "type": "User",
    "site_admin": false
  }
]
Then assemble this data in the custom code node:

¶ Example 1: Traversing input data for data processing
In custom code, Node.js can use methods such as map and filter, as well as for loops, to perform a series of processing on the input data:
For example, adding a field source to each incoming element with a value of "github"
return data.map(item => {
    item.source = "github";
    return item;
});
You can also introduce lodash (opens new window) 包:
const _ = require("lodash");
return _.map(data, x => {
  x.source = "github";
  return x;
});
For example, filter out elements with id less than or equal to 1
return data.filter(item => {
    return item.id <= 1;
});
¶ Example 2: Sending network requests in custom code
Authing custom code nodes have built-in axios (opens new window) Network request library, you can use it to send network requests, as shown below: We traverse each element of the input data and then request the follows_URL field to obtain the list of Followers for this GitHub user::
const axios = require("axios");
const getFollowers = async (url) => {
  const { data } = await axios.get(url);
  return data;
};

for (const item of data) {
  const { followers_url } = item;
  const followers = await getFollowers(followers_url);
  item.followers = followers;
}

return data;
¶ Precautions
- Node.js buffer cannot be used in custom code blocks. If you need to operate a buffer in custom code, it is recommended to develop an interface on your server and use HTTP nodes to call it.
- The built-in tool class functions in Authing are all asynchronous functions that require the use of await.